DIY Confetti Art Tutorial: Creating Eco-Friendly Masterpieces with MI eCONFETTI
Posted on
0 comments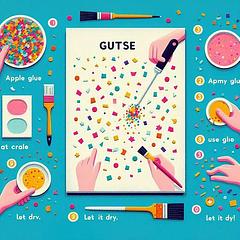
Welcome to the colourful world of confetti art! If you’re looking to add a splash of joy and creativity to your home, look no further.
In this tutorial, I'll guide you through the process of creating your own confetti art using MI eCONFETTI’s biodegradable products. Not only will you end up with a stunning piece of art, but you’ll also be making an eco-friendly choice. Let’s get started!
Materials Needed:
- MI eCONFETTI’s Biodegradable Confetti (assorted colours)
- A base for your art (canvas, card-stock, or any flat surface)
- Non-toxic glue or mod podge
- A paintbrush or sponge
- A clear sealant spray (optional)
Step 1: Choose Your Confetti Mix Selecting the right confetti mix is crucial. Think about the mood you want to convey. Do you want a vibrant, energetic piece, or something more subdued and elegant? MI eCONFETTI offers a variety of colour mixes that can suit any theme or occasion.
Step 2: Prepare Your Base Your base should be sturdy enough to hold the confetti without bending. Canvas works great for a traditional look, while card-stock is perfect for smaller pieces. Make sure your base is clean and dry before you begin.
Step 3: Sketch Your Design Lightly sketch your design onto the base. You can go for abstract patterns, geometric shapes, or even a confetti portrait. If you’re not confident in your drawing skills, use stencils or templates.
Step 4: Apply the Glue Using your paintbrush or sponge, apply a thin layer of glue to a small section of your base. Work in sections to prevent the glue from drying out before you apply the confetti.
Step 5: Sprinkle the Confetti Gently sprinkle the confetti over the glued area. Don’t be afraid to mix colours and sizes to create depth and texture. Once the area is covered, press down lightly to ensure the confetti sticks.
Step 6: Repeat and Fill Continue applying glue and confetti until your entire design is covered. If you make a mistake, don’t worry! Just lift off the confetti and try again.
Step 7: Seal Your Artwork Once your design is complete and the glue has dried, consider using a clear sealant spray to protect your artwork. This step is optional but recommended if you plan to display your art where it might be touched.
Step 8: Display Your Creation Now that your confetti art is finished, it’s time to show it off! Frame it, hang it, or gift it to someone special. Remember, each piece is unique and tells its own colourful story.
Tips for Success:
- Experiment with layering different colours and sizes of confetti to create new hues and textures.
- If you’re using a canvas, try extending your design over the edges for a modern look.
- Involve kids in the process for a fun family craft day – just be sure to supervise the use of glue and sealant.
Creating confetti art is not just about the end product; it’s about the joy of making something beautiful by hand. With MI eCONFETTI’s biodegradable confetti, you’re also making a positive impact on the environment.
So, gather your materials and let your imagination run wild. Happy crafting!
← Older Post Newer Post →

0 comments